File Browser
File Browser component overview
Rapid Platform allows you to set up SharePoint folders for each item. The File Browser component can be perceived as an interface to the relevant SharePoint folder. It allows you to access the relevant SharePoint folder, upload new files, view the contents of the folder, add folders and much more, all from within the Explorer interface.
How to set up File Browser component in Designer
-
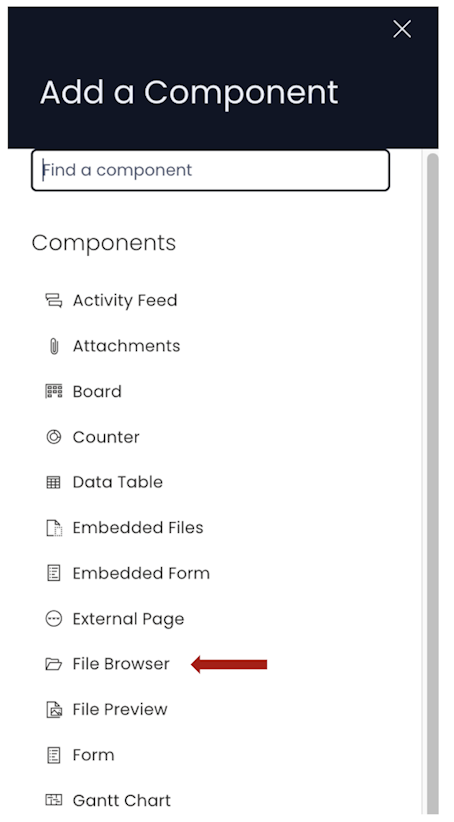
You can add the File Browser component on to the Layout / Page. This component is present on the Individual Item (Singular) Details breakpoint by default. It is in the Files Tab.
-
If the File Browser component is on a Grid Layout, you can resize and move the component over the layout.
-
You can set the **visibility of File Browser on the Details breakpoint.

-
You can set the [visibility of File Browser on the Create Screen breakpoint](/docs/Rapid/3-Keyper%20Manual/2-Designer/2-Pages/5-how-to-guides/how-to-hide-components-on-breakpoints/how-to-hide-components-on-breakpoints.md "How to set a component to be visible / hidden on "Item Details" and "Create" breakpoints?").

-
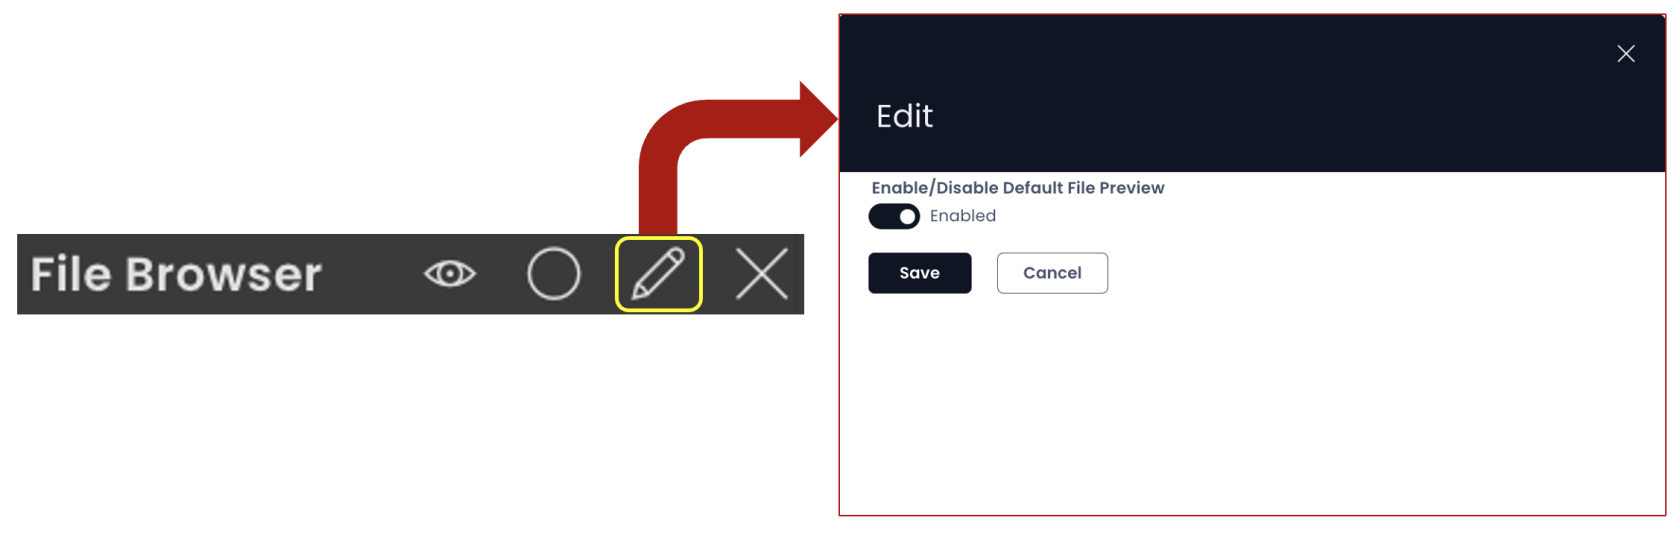
You can configure the File Browser component by clicking on the Edit (pencil) icon.
-
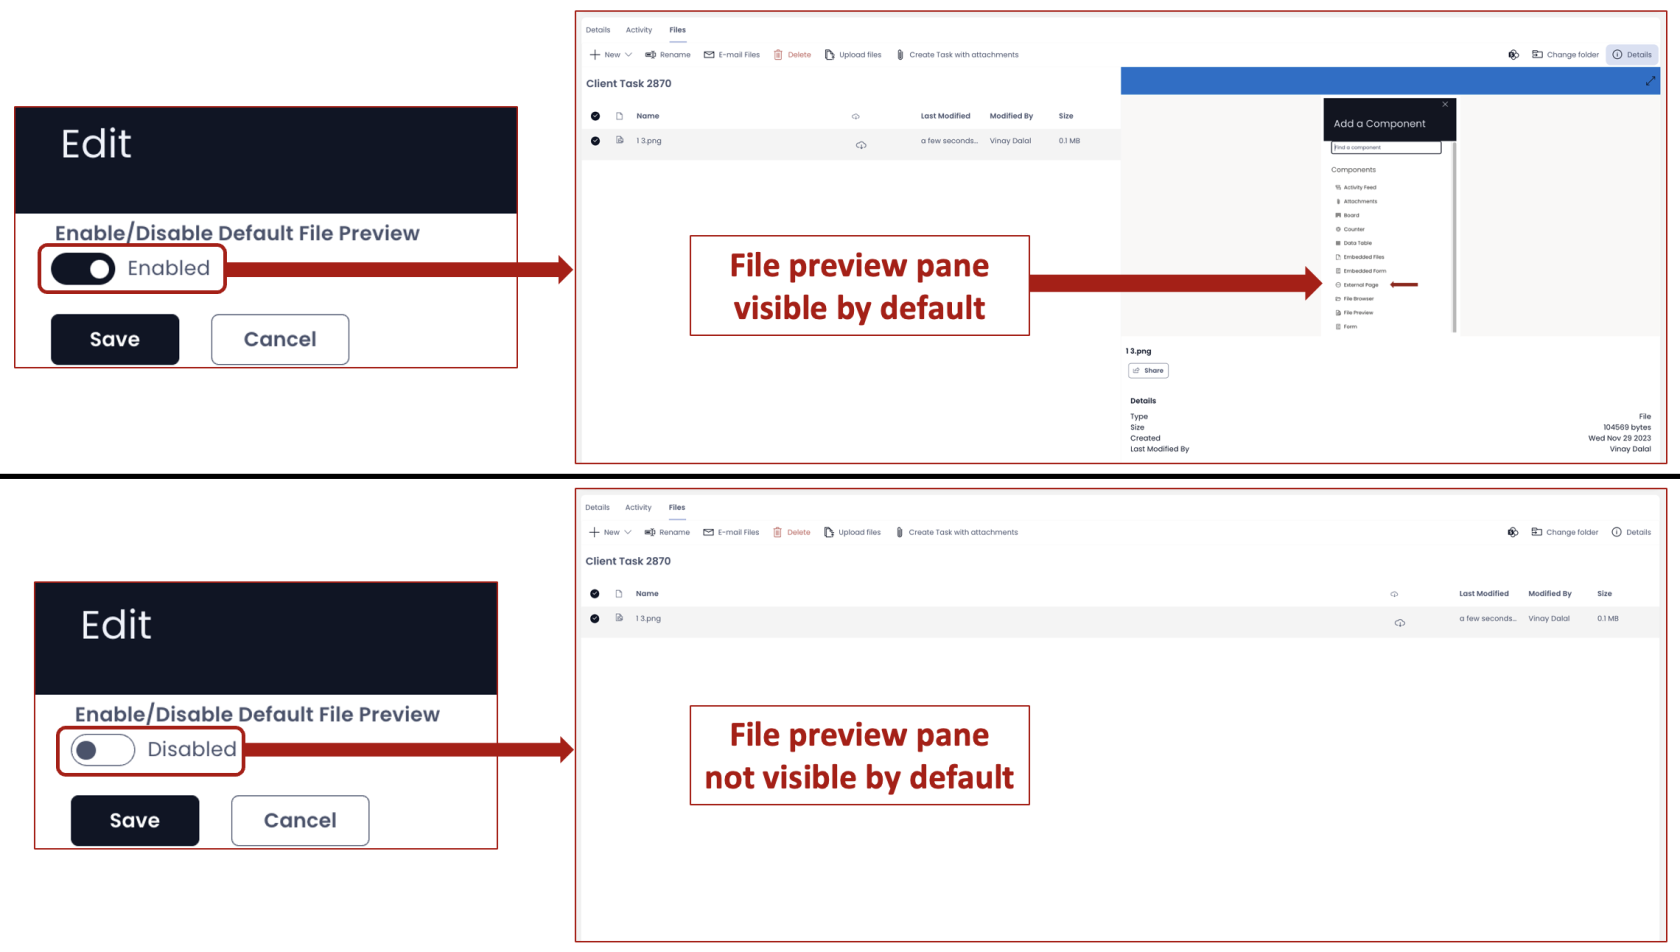
You can enable / disable whether the preview pane (in the File Browser - Explorer) should appear by default or not.
Please note:
- Although Files Browser component is present on the Files Tab of the Individual Item (Singular) Details breakpoint by default, you can add it to other layouts as well.
- Files Browser component provides an interface to the Individual Item's SharePoint folder, therefore, although you can (theoretically) add the component to the Group Items List (Plural) level, it does not have a logical purpose there.
- You can configure the default setting (open or closed) for the Preview Pane from Designer. However, the user can open or close the preview pane in Explorer.
- It is worth noting that for each file, a Table has a SharePoint Folder allocated within a SharePoint Drive. Each new item is created as a folder within the Table's SharePoint folder. The File Browser points to the item's SharePoint Folder.
Configuring Document Storage
- When viewing the File Browser component on an item page, if the Table has not had its document storage configured, the component will display the following message:
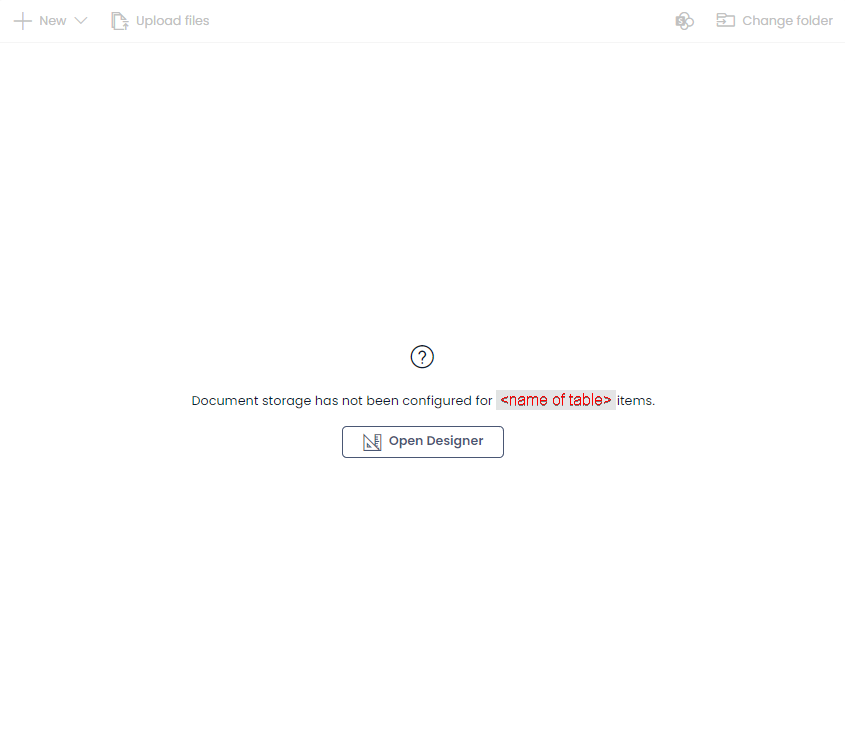
- Press the "Open Designer" button to launch the Designer application

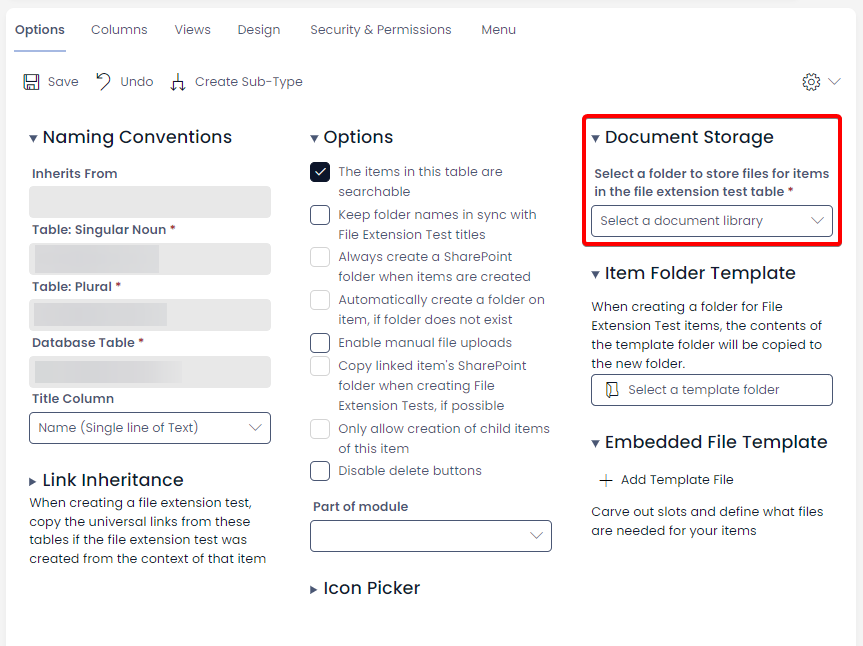
- In the Designer options page that opens, select the desired Document Library using the drop-down menu in the Document Storage section (this section is highlighted in the image below)
-
Select the desired documents folder in the desired Storage Location.
-
Ensure you Save your changes.